
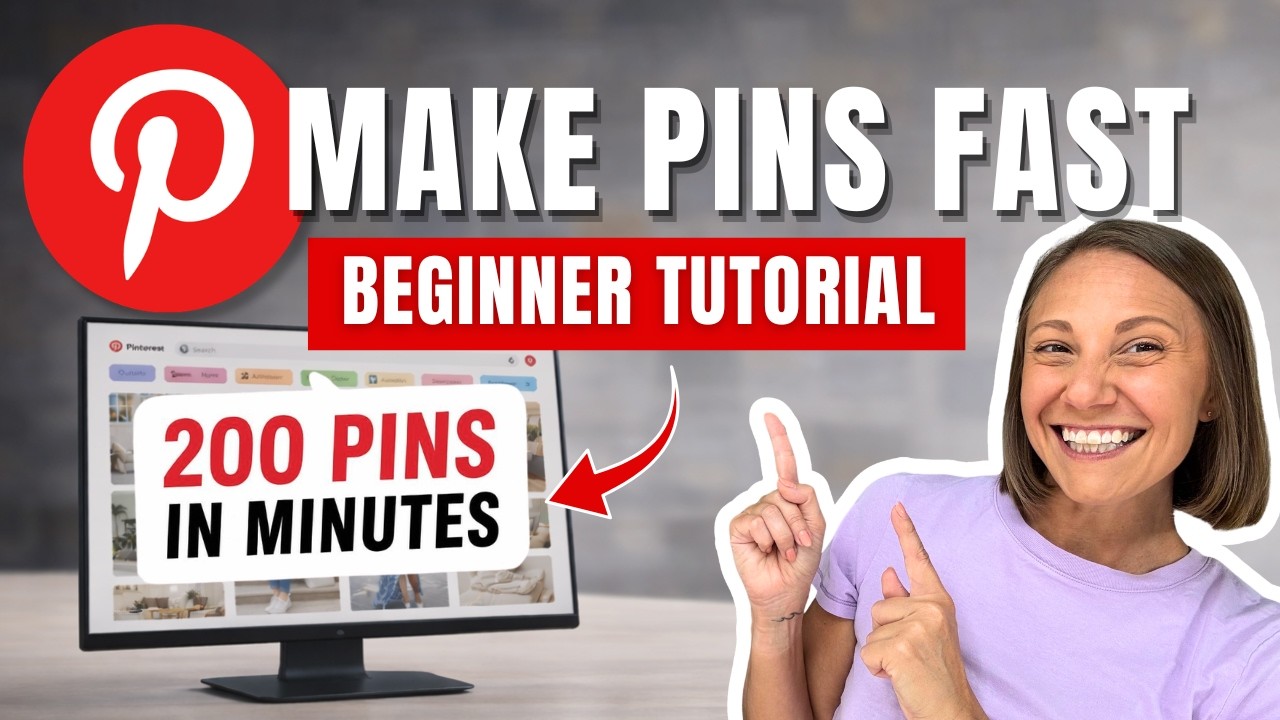
How to Make Pins Fast: Pinterest Pin Automation for Beginners
13 June 2026
If you’ve ever sat down to create a few Pinterest pins and looked up an hour later having barely made a dent, then you already know the problem. Even if each pin only takes ten minutes, three pins a day can quickly add up to thirty minutes of design work before you’ve even touched keyword research, written a description, or scheduled anything. Yikes! For most bloggers, shop owners, and side hustlers, this time simply isn’t there.
With over 631 million monthly users, Pinterest continues to be one of the most powerful platforms for getting your content, products, and links in front of people who are already looking for them. However, Pinterest only works if you’re showing up consistently. And with the introduction of AI and automation tools, there are now much smarter ways to handle the pin creation and scheduling process without it taking over your week.
Today, we’re walking you through how to make Pinterest pins fast using Pin Generator’s automation workflow, so you can stay active on Pinterest and build real momentum without burning out in the process.
Why Manual Pin Creation Leads to Burnout
Pinterest rewards accounts that post consistently over time, with most accounts seeing real movement around the 60 to 90 day mark, and meaningful traffic growth around six to twelve months. That’s a long runway, and if you’re manually designing every pin from scratch, writing every description, and scheduling everything by hand, you’re essentially adding a part time job to whatever else you’re already managing.
The pattern that trips most people up is starting strong, posting consistently for a few weeks, burning out, disappearing for a month, and then wondering why their account isn’t growing. The inconsistency is the problem, not the content, and the only way to stay consistent without burning out is to have a system that handles the repetitive work for you.
We’re covering all of this info, along with a full visual walkthrough on our YouTube channel. You can watch the video here:
Pin Generator Automation Flow vs Generate Page
There are two main ways to create pins inside Pin Generator: the new ‘Automation’ workflow and the legacy ‘Generate’ page.
If you’ve used Pin Generator before, then you’d recognize the Generate page. It’s the more hands on option, where you drop in a URL and Pin Generator scans your website or shop to create custom pins in seconds. The benefit here is the ability to manually adjust pins, work in smaller batches, perform A/B testing, and play around with styling and tools. You have access to all the same features and controls (including saving and scheduling), but it’s an intentional process where you decide when to scan and create pins. If you want full control over an intentional process, the Generate page is your tool, but if you want something fully automated and ongoing, the Automation flow is where you want to be.
The Automation flow works differently. You connect your website, shop, or links once, set your preferences, and Pin Generator creates and schedules pins for you automatically on a rolling basis, weekly or monthly. You still review everything before it goes live, but the repetitive design and scheduling work is handled for you, which makes it the better long term option for anyone who wants to stay consistently active on Pinterest without it taking over their schedule.
Setup Your First Pinterest Pin Automation (Walkthrough)
Head to pingenerator.com and click Start Pinning Now. If you want to follow along visually, we have a full video walkthrough linked here.
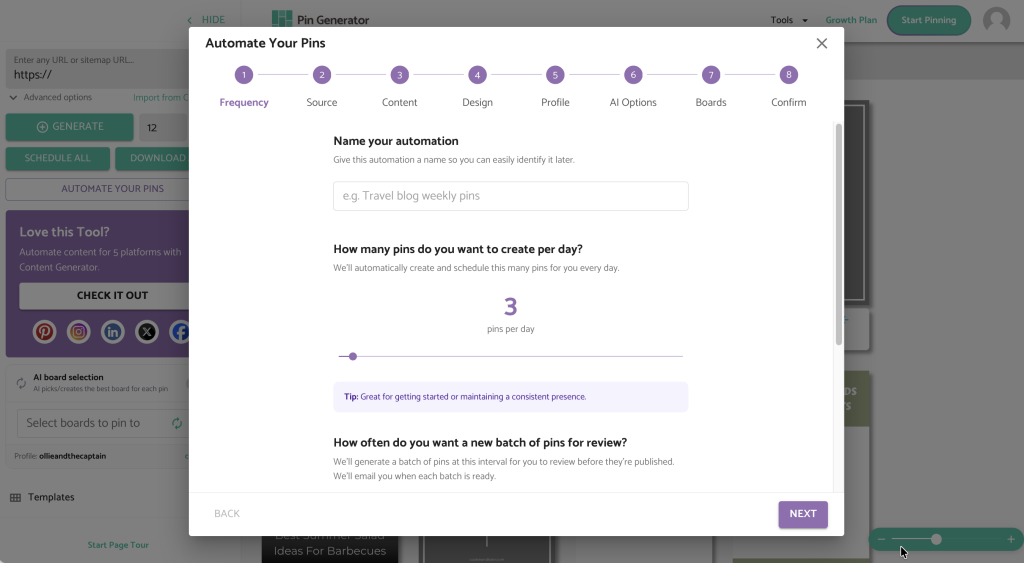
Step 1: Name your automation Something like “travel blog weekly pins” or “summer shop pins” works well. If you’re running multiple automations for different projects or niches, naming them clearly will save you a lot of confusion later.
Step 2: Set your pinning frequency and review schedule One to three pins per day is a solid starting point, keeping your activity consistent without overwhelming your account. For review frequency, weekly is recommended when you’re first getting started so you can monitor what’s going out and make adjustments before anything goes live.
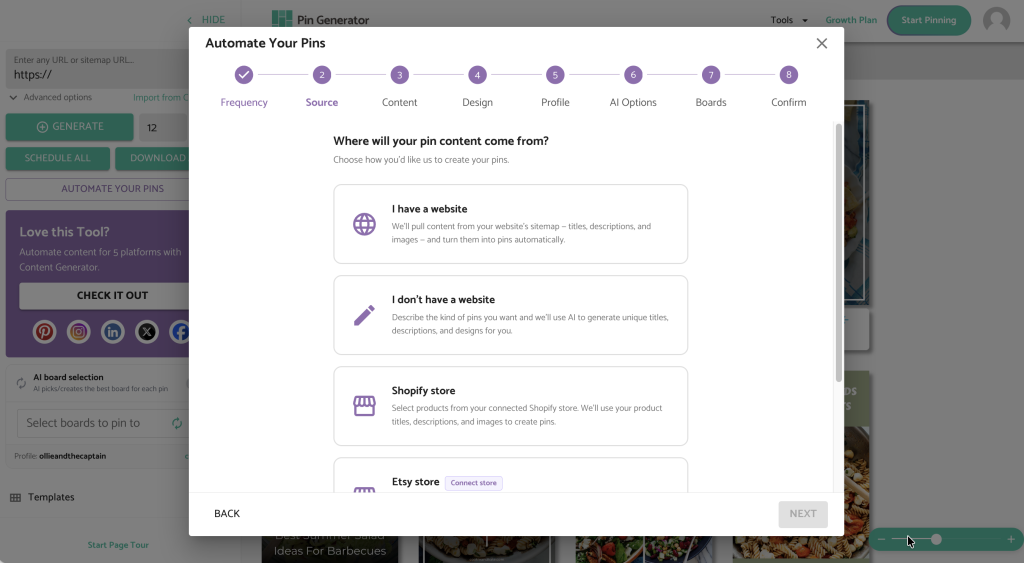
Step 3: Connect your website or shop You’ll be asked to connect your website, Shopify store, Etsy store, or WooCommerce store. If you have one, connect it and Pin Generator will pull your content automatically. If you don’t have a website, there’s an option for that too and you can still use the automation flow by adding your links manually. If you’re doing affiliate marketing without a website, we have a full tutorial here.
Step 4: Describe your pins The more specific you are here the better, because this description shapes the AI generated titles, descriptions, and images. Think about your niche, your audience, and the tone and aesthetic you want your pins to convey.
Step 5: Add your outbound links These are the URLs you want your pins to point to. Pin Generator rotates through them so you’re consistently promoting content across your whole library rather than repeating the same URL.
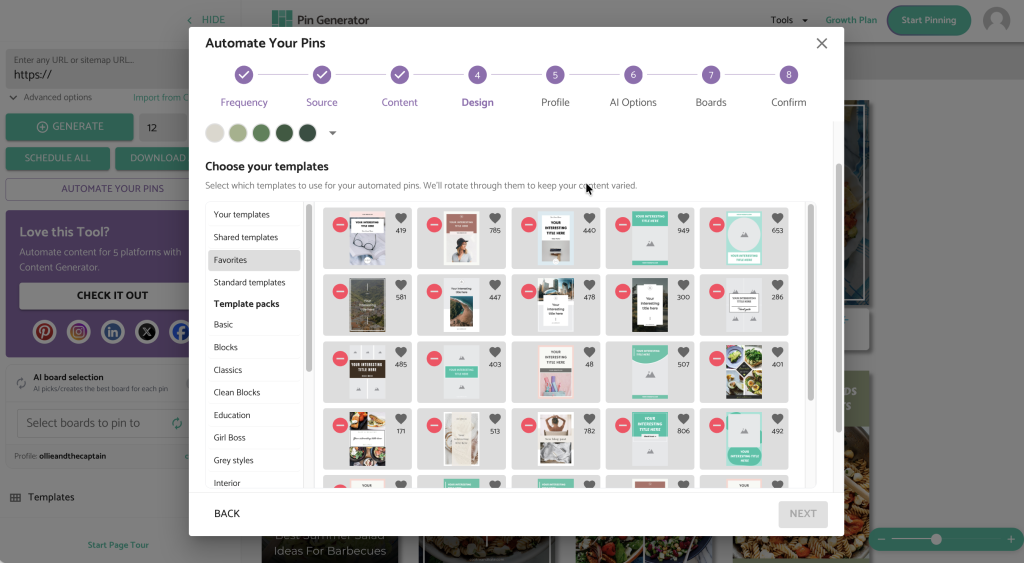
Step 6: Choose your templates, colors, and AI preferences Select a color palette and templates that match your branding. Then set your AI preferences for titles, descriptions, and images. If you’re using affiliate links, add your disclosure text like hashtag affiliate or hashtag ad here so every pin that goes out is already compliant.
Step 7: Choose your boards and generate Select your boards manually or let the AI choose based on your content. Review everything and hit generate. You’ll get an email when your pins are ready, or you can review them directly on the Generate page and make any tweaks before anything goes live.
After Setup: Optimize + Analytics
Setting up your automation is just the starting point. Once it’s running, your focus should shift from creating to reviewing and optimizing. Check your Pinterest analytics once a month and look at which pins are driving the most outbound clicks. If certain templates, image styles, or topics are consistently performing well, go back into your automation settings and lean into those. If something isn’t getting traction after a few weeks, try a different angle, whether that’s the image style, the headline, or the keyword focus.
Paying attention to your top pins is especially useful here. If one pin is significantly outperforming everything else, look at what made it work and deliberately build more pins around that formula. The automation flow works best when you’re feeding what you learn back into your settings over time, and small adjustments made consistently add up to much stronger results.

How to Get Started
Staying consistent on Pinterest doesn’t have to mean spending hours every week on pin creation. With the right system in place, your account can stay active and your content can keep getting in front of new people while you focus on running your business.
Try Pin Generator for free today and you’ll see just how quickly it speeds up your pin creation.
Let’s get generating!


