
Pin Creation
9 July 2026
Pin creation looks simple until you actually sit down to make one. Then suddenly you are debating fonts like a medieval philosopher, cropping product photos with the precision of a brain surgeon, and wondering whether “10 Cozy Fall Ideas” sounds helpful or like a suspiciously cheerful hostage note. Good news: effective pin creation does not require design wizardry, a bottomless coffee supply, or sacrificing your afternoon to the algorithm goblin.
It does require a clear process. Pinterest is a visual search engine, which means your pins need to do two jobs at once: catch attention in the feed and communicate relevance to search. That is where smart design, strategic sizing, keyword-rich captions, and consistent scheduling come in. Nail those pieces, and your pins can drive traffic long after your latest Instagram post has quietly wandered into the social media basement.
In this guide, we will walk through the full pin creation workflow: planning, design, sizing, copywriting, SEO, scheduling, testing, and automation. We will also show where tools like PinGenerator can save you from making every single pin by hand like it is 2012 and your mouse has a vendetta.
Why Pin Creation Matters More Than Your Coffee-Fueled Brain Thinks
Pinterest is not just another social platform where content disappears after a few hours. It behaves more like a search engine with a mood board addiction. People use it to plan purchases, discover ideas, compare products, and save content for later. According to Pinterest Business audience insights, hundreds of millions of people use Pinterest every month to discover and plan what to do or buy next. That makes your pins tiny traffic-generating billboards with a longer shelf life than most social posts.
But here is the catch: Pinterest rewards consistency and freshness. One perfect pin is nice. Ten strong variations leading to the same blog post or product page? Much better. Fifty well-designed pins scheduled over time across relevant boards? Now we are cooking with traffic-flavored gas.
Effective pin creation helps you:
- Drive consistent traffic to blog posts, product pages, landing pages, and affiliate content.
- Increase brand visibility in Pinterest search and recommendation feeds.
- Test different headlines, images, colors, and layouts to see what earns clicks.
- Turn one piece of content into multiple visual assets without reinventing the wheel.
- Build a repeatable content engine instead of playing “What should I post today?” roulette.
This is exactly why manual pin design becomes painful fast. If you publish regularly, you need volume. If you sell products, you need variety. If you manage client accounts, you need sanity. A strong pin creation process gives you all three, preferably without turning your desktop into a chaotic folder graveyard named “final-final-v7-actuallyfinal.png.”
Step 1: Start With the Goal, Not the Glitter
Before choosing colors, fonts, or that suspiciously perfect stock photo of a woman laughing at salad, decide what the pin is supposed to accomplish. Every pin should have one primary goal. Not twelve. Not “brand awareness, conversions, email signups, world peace, and maybe Etsy sales.” One.
Common goals for Pinterest pins include:
- Traffic: Send people to a blog post, recipe, tutorial, guide, or resource page.
- Product discovery: Promote an e-commerce listing, collection, or seasonal product.
- Lead generation: Drive users to a freebie, webinar, checklist, or email opt-in.
- Affiliate clicks: Promote product roundups, reviews, or buying guides.
- Brand visibility: Build recognition around your niche, aesthetic, or expertise.
Your goal determines your design and copy. A blog traffic pin might need a bold educational headline such as “7 Kitchen Storage Ideas for Tiny Apartments.” A product pin might need a clean product image, benefit-driven text, and seasonal context like “Minimalist Desk Lamp for Cozy Home Offices.” A lead magnet pin may work best with a clear promise: “Free Pinterest Content Calendar Template.”
This is where many creators go wrong. They start with a pretty template and then cram in whatever text fits. That is like buying a suitcase and then deciding where to go based on which socks fit inside. Start with the destination first.
If you want a deeper look at using tools to speed up this workflow, the PinGenerator team has a helpful breakdown of what to look for in a pin creation tool. The short version: the best process is one you can repeat without needing a nap and a motivational speech.
Step 2: Use Pinterest-Friendly Sizing and Layouts
Pin creation has one design law you should tattoo on your metaphorical forehead: vertical wins. Pinterest’s feed favors tall, vertical images because they take up more visual space and are easier to scan on mobile. Pinterest recommends a 2:3 aspect ratio for standard pins, such as 1000 x 1500 pixels, according to Pinterest’s creative best practices.
That does not mean every pin must be identical, but it does mean you should avoid awkward horizontal graphics that look like they got lost on the way to Facebook. If your pin is too tall, Pinterest may truncate it. If it is too wide, it can disappear in the feed like a beige sock in a laundry basket.
Recommended Pin Dimensions
- Standard pin: 1000 x 1500 pixels, 2:3 ratio.
- Square pin: 1000 x 1000 pixels, usable but less feed-dominating.
- Video pin: Vertical formats such as 9:16 or 2:3 often perform well on mobile.
- Infographic-style pin: Can be taller, but avoid making it excessively long unless the content truly needs it.
For layout, think in zones. The top of the pin should create instant curiosity. The center should deliver the core visual or promise. The bottom can hold branding, a URL, logo, or call-to-action. Keep it clean. If users need a magnifying glass and a graduate degree to read your pin, the design has failed.
A practical layout formula:
- Use a strong image or background that matches the topic.
- Add a large headline with high contrast.
- Include a small supporting phrase or benefit if needed.
- Place your logo or site name subtly near the bottom.
- Leave enough white space so the design can breathe like it just finished yoga.
PinGenerator’s template system is built around Pinterest-friendly dimensions, so you are not manually resizing every graphic like a digital blacksmith. You can choose from professionally designed templates, customize fonts and colors, and generate multiple variations from one URL or product listing.
Step 3: Design Pins That Stop the Scroll Without Screaming
Your pin needs to grab attention, but “attention-grabbing” does not mean neon chaos, six fonts, and a headline that looks like it is yelling from a moving car. Good pin design is clear, readable, and emotionally relevant.
Start with contrast. Text should stand out from the background. Dark text on a light overlay, white text on a dark image, or bold color blocks can work beautifully. Avoid placing text directly over busy photos unless you add a solid or semi-transparent overlay. Otherwise your headline may vanish into a pile of throw pillows, and nobody wants that.
Next, use hierarchy. The most important words should be biggest. For example, in “15 Budget Patio Ideas for Small Spaces,” the phrases “Budget Patio Ideas” and “Small Spaces” should be visually dominant. Supporting words can be smaller. This helps users understand the pin in one glance.
Design Principles That Actually Matter
- Readability: Use large fonts that are easy to read on mobile.
- Contrast: Make text pop against the background.
- Consistency: Use brand colors, fonts, and visual style across pins.
- Whitespace: Give elements room so the pin does not feel crowded.
- Relevance: Match images to the promise of the pin.
- Emotion: Use visuals that evoke aspiration, relief, curiosity, or desire.
According to Hootsuite’s Pinterest statistics roundup, Pinterest is especially powerful for product discovery and shopping behavior. That means your visuals should not just be pretty; they should help someone imagine the outcome. A food blogger should show the finished recipe looking delicious, not a sad beige bowl of uncertainty. A home decor seller should show the product in context, not floating on a white background unless that style supports the buying decision.
For e-commerce pin creation, lifestyle imagery often helps because it shows the product in use. For blog content, text overlays are essential because they communicate the value of clicking. For affiliate content, comparison-style pins and list-based headlines can perform well because users are already researching options.
Step 4: Write Pin Titles and Descriptions That Pinterest Can Understand
Design gets the click, but copy helps Pinterest understand what your pin is about. Your pin title and description should include relevant keywords naturally. Not in a robotic “best shoes shoes best walking shoes walk best” way. Pinterest is smart enough to understand context, and users are smart enough to run away from keyword soup.
For strong pin creation, your text should answer three questions:
- What is this pin about?
- Who is it for?
- Why should someone click or save it?
Example weak title: “My New Blog Post”
Example better title: “12 Easy Meal Prep Ideas for Busy Weeknights”
Example weak description: “Check this out for more info.”
Example better description: “Discover simple meal prep ideas for busy weeknights, including make-ahead dinners, healthy lunches, and time-saving kitchen tips for stress-free cooking.”
See the difference? The second version tells Pinterest and the reader exactly what is inside. It includes keywords such as “meal prep ideas,” “busy weeknights,” “make-ahead dinners,” and “healthy lunches” without sounding like a malfunctioning grocery list.
For additional guidance on content creation workflows, you may like this post on how to automate content creation with a content generator. It covers how automation can support, not replace, human strategy. Because yes, robots can help write. No, they should not be allowed to name your cat.
A Simple Pin Description Formula
Use this structure when writing descriptions:
- Start with the main keyword or topic.
- Add a benefit or outcome.
- Include related terms naturally.
- End with a soft call-to-action.
Example: “Learn practical pin creation tips for designing Pinterest graphics that attract clicks, improve visibility, and support consistent content marketing. Get sizing, layout, caption, and scheduling ideas for better Pinterest results.”
PinGenerator includes AI-powered title, description, and alt text generation, which is handy when you are creating dozens of pins and your brain starts producing captions like “Nice thing for people who like things.” The AI can rewrite content variations, help avoid duplicates, and keep your publishing workflow moving.
Step 5: Build Multiple Pin Variations Because One Pin Is Not a Strategy
One of the biggest mistakes in pin creation is making a single pin for a piece of content and calling it done. That is like opening a bakery and selling one muffin. Brave, but financially confusing.
Pinterest allows you to test different creative angles for the same URL. A blog post about “small kitchen organization” could become several different pins:
- “10 Small Kitchen Organization Ideas That Actually Work”
- “Tiny Kitchen? Try These Space-Saving Storage Tricks”
- “Before-and-After Small Kitchen Organization Tips”
- “Budget-Friendly Kitchen Storage Ideas for Small Apartments”
- “Declutter Your Kitchen With These Simple Organizing Hacks”
Each version appeals to a slightly different search intent. Some users want budget ideas. Others want small-space tips. Others want decluttering help. By creating multiple pins, you increase your chances of matching what people are searching for.
Design variations matter too. Test different:
- Headline wording
- Background images
- Color palettes
- Font styles
- Text placement
- Calls-to-action
- Product angles or lifestyle images
This is where bulk pin creation becomes extremely useful. With PinGenerator, you can paste a URL, import a product, or connect a store, then generate dozens of unique pin designs using different templates and layouts. Instead of manually duplicating a design and nudging text boxes around for two hours, you can produce a batch quickly and focus on strategy. Your wrists will send a thank-you note.
Step 6: Optimize for Pinterest SEO Without Turning Into a Keyword Gremlin
Pinterest SEO is a major part of pin creation because Pinterest uses keywords to understand and distribute content. Your keywords can appear in the pin title, description, board name, board description, image file name, and even on-pin text.
The best place to start is Pinterest’s own search bar. Type your core topic and look at autocomplete suggestions. These suggestions reflect common searches. For example, typing “wedding centerpieces” might reveal modifiers such as “budget,” “rustic,” “DIY,” “fall,” or “simple.” Those terms can shape your pin topics and descriptions.
You can also use broader SEO and content research tools. For trend-based planning, Pinterest Trends is especially helpful because it shows when topics rise and fall throughout the year. This matters because Pinterest users plan early. Holiday content, seasonal decor, gift guides, travel plans, and fashion trends often gain traction weeks or months before the actual event.
Where to Use Keywords
- On-pin text: Include the primary topic in the headline.
- Pin title: Use a clear, searchable phrase.
- Pin description: Add related terms naturally.
- Board selection: Pin to boards that match the topic closely.
- Image file name: Use descriptive names before uploading when possible.
- Destination page: Make sure the linked page matches the pin topic.
Relevance matters. If your pin promises “DIY Halloween Porch Decor” but links to a generic homepage, users will bounce faster than a toddler near a trampoline. Pinterest also cares about user engagement, so misleading pins are not a long-term strategy. They are a short-term way to annoy people and possibly train the algorithm to ignore you. Charming.
PinGenerator’s keyword research and trend alert features can help you discover what people are searching for in your niche, then build pins around timely topics. This is particularly useful for bloggers, affiliate marketers, and e-commerce sellers planning seasonal campaigns.
Step 7: Schedule Pins Like a Calm Professional, Not a Midnight Goblin
Consistency is the unglamorous secret sauce of Pinterest marketing. You do not need to publish 900 pins a day while whispering affirmations to your analytics dashboard. But you do need a reliable posting rhythm.
According to Sprout Social’s guidance on social media content strategy, consistent planning and publishing are central to effective social media performance. Pinterest is no exception. Regular activity gives your content more chances to be discovered, tested, saved, and clicked.
A practical Pinterest schedule might include:
- Fresh pins for new blog posts or products.
- New variations for older evergreen content.
- Seasonal pins published ahead of peak interest.
- Product pins rotated across relevant boards.
- Video pins mixed in for additional engagement opportunities.
If you are pinning manually, this can become tedious quickly. First you create the design. Then you write the title. Then the description. Then choose a board. Then schedule. Then repeat until your soul exits through the nearest window.
This is why scheduling tools matter. PinGenerator includes built-in scheduling, bulk publishing, and repeating pins, so you can create pins and schedule them without jumping between separate platforms. If scheduling is your current bottleneck, check out this detailed guide to using a Pinterest pin scheduler to stay consistent without living inside your content calendar.
Best Practices for Scheduling
- Spread pins over time instead of dumping everything at once.
- Pin to the most relevant boards first.
- Create fresh designs for the same URL rather than posting identical pins repeatedly.
- Plan seasonal content early, often 30 to 60 days before peak interest.
- Review analytics monthly and adjust based on saves, clicks, and outbound traffic.
Remember: scheduling is not about tricking the algorithm. It is about showing up consistently with useful, relevant content. Less chaos, more calendar. Very adult. Slightly suspicious, but effective.
Step 8: Turn One URL Into a Month of Pins
The smartest pin creation systems do not start from scratch every time. They repurpose existing content. One blog post, product listing, podcast episode, YouTube video, or landing page can become a full batch of pins if you approach it strategically.
Let’s say you wrote a blog post called “Beginner’s Guide to Container Gardening.” From that single URL, you could create pins for:
- Beginner container gardening tips
- Best vegetables for container gardens
- Small balcony gardening ideas
- Container gardening mistakes to avoid
- Budget-friendly gardening supplies
- Seasonal planting checklist
- Herb garden ideas for beginners
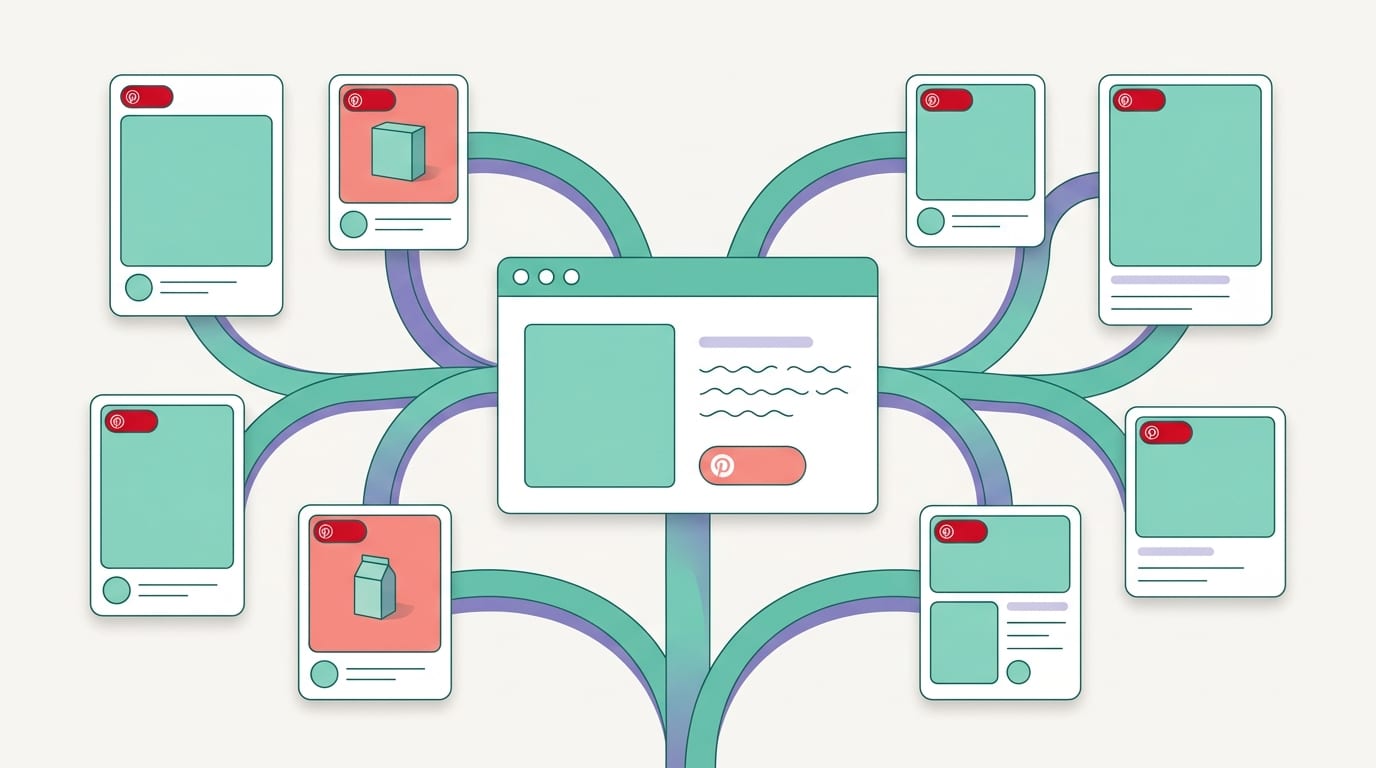
Each pin can link to the same comprehensive guide while highlighting a different benefit or subtopic. That gives you more search coverage and more creative testing opportunities.
For bloggers, RSS automation can take this even further. When you publish a new post, an automation system can generate pins from the content and prepare them for scheduling. If that sounds like the kind of magic your content workflow needs, read this guide on automating Pinterest pin creation with RSS feeds.
For e-commerce sellers, the same principle applies to product catalogs. A single product can be shown in multiple ways: lifestyle image, feature callout, seasonal use case, gift guide angle, comparison angle, and sale announcement. PinGenerator connects with Shopify, Etsy, WooCommerce, and other workflows so sellers can import product data instead of copy-pasting titles and prices until their eyes become spreadsheet-shaped.
Step 9: Measure What Works and Stop Guessing Like a Mystic Hamster
Once your pins are live, your job is not done. Now you measure. Pinterest analytics can tell you which pins earn impressions, saves, clicks, and outbound traffic. This data helps you improve future pin creation instead of guessing based on vibes and one unusually enthusiastic comment from your aunt.
Key metrics to watch:
- Impressions: How often your pin appeared on Pinterest.
- Saves: How often users saved your pin to a board.
- Pin clicks: How often users clicked to view the pin close-up.
- Outbound clicks: How often users clicked through to your website.
- Engagement rate: How well the pin encouraged interaction.
Do not judge a pin too quickly. Pinterest content can take time to gain traction, especially for SEO-driven topics. Review performance over weeks and months, not just hours. Some pins are slow burners. Others are tiny rockets. Some are decorative potatoes. Data will tell you which is which.
Look for patterns. Are list-based headlines getting more clicks? Do warm colors outperform cool colors? Are product close-ups better than lifestyle shots? Are “how to” pins driving more saves than “best of” pins? Use those insights to refine your templates, topics, and scheduling strategy.
For broader social measurement context, Buffer’s guide to social media analytics offers a useful overview of how marketers can connect content performance to goals. The same principle applies here: measure what matters, then improve the next batch.
A Practical Pin Creation Checklist You Can Steal Immediately
Before you publish your next pin, run through this checklist. It is cheaper than hiring a consultant and less judgmental than your inner perfectionist.
- Is the pin vertical, ideally using a 2:3 ratio?
- Can the headline be read easily on mobile?
- Does the design have enough contrast?
- Is the image relevant to the destination page?
- Does the pin title include a clear keyword?
- Does the description explain the benefit and include related terms?
- Is the pin saved to a relevant board?
- Does the destination URL match the pin promise?
- Have you created more than one variation?
- Is the pin scheduled as part of a consistent strategy?
If you can check most of these boxes, your pin is already ahead of a lot of content floating around Pinterest wearing a confusing font hat.
Common Pin Creation Mistakes to Avoid
Even smart creators make messy pins sometimes. The goal is not perfection; the goal is improvement. Still, a few mistakes are worth avoiding because they can quietly sabotage your results.
Using Tiny Text
Most Pinterest users browse on mobile. If your text looks elegant on a desktop but microscopic on a phone, it will not perform well. Make the headline big, bold, and scannable.
Designing Without Keywords
A beautiful pin with vague copy is a missed opportunity. Pinterest needs context. Include searchable phrases in the title, description, and on-pin text.
Linking to Irrelevant Pages
If your pin promotes “easy vegan dinner recipes,” do not link to a homepage, category page, or unrelated product. Send users directly to the promised content.
Posting the Same Pin Repeatedly
Freshness matters. Instead of reposting identical pins, create new designs, headlines, or angles for the same URL.
Ignoring Analytics
If you never review performance, you are basically throwing pins into the void and hoping the void has good taste. Check your data and adapt.
How PinGenerator Streamlines the Whole Pin Creation Circus
Let’s be honest: pin creation is not hard because one pin is difficult. It is hard because Pinterest success often requires many pins, published consistently, with fresh designs and relevant descriptions. That is where the work piles up like laundry with a marketing degree.
PinGenerator is designed to remove that bottleneck. You can enter a URL, import products from platforms like Shopify or Etsy, choose from 100+ Pinterest-optimized templates, generate AI-written titles and descriptions, and schedule the finished pins directly. It combines design, copywriting, automation, and publishing in one workflow.
That is useful for:
- Bloggers turning every article into multiple pins.
- E-commerce sellers creating product pins at scale.
- Affiliate marketers testing different promotional angles.
- Agencies managing Pinterest for multiple clients.
- Small businesses that need traffic but do not have a full-time designer.
The real benefit is not just speed. It is consistency. When you can create a month of Pinterest content quickly, you are more likely to keep showing up. And on Pinterest, showing up with fresh, relevant pins is half the battle. The other half is not naming your files “asdfghjkl-final.png.” We believe in you.
Final Thoughts: Better Pins, Less Panic
Pin creation is part design, part SEO, part copywriting, and part scheduling discipline. That sounds like a lot, but once you build a repeatable system, it becomes much easier. Start with a clear goal. Use Pinterest-friendly dimensions. Design for mobile readability. Write keyword-rich titles and descriptions. Create multiple variations. Schedule consistently. Measure what works. Repeat without dramatic sighing, if possible.
The creators and businesses that win on Pinterest are not always the ones with the fanciest designs. They are the ones who understand what their audience wants and publish helpful, attractive, searchable pins consistently. Pretty plus strategic beats pretty-but-random every time.
If you want to speed up your pin creation workflow without hiring a designer, wrestling with spreadsheets, or manually scheduling pins until your coffee turns cold, give PinGenerator a look. It helps you turn URLs, blog posts, and product listings into batches of polished Pinterest pins in minutes. Less repetitive clicking. More traffic potential. Fewer existential design crises. A solid trade, honestly.